How to Configure Wireless Access Point in Packet Tracer
Wireless networks are the fundamental component of today’s networking environment. However, if you are working in the field of computer networking and cannot configure a wireless network,. It could negatively impact your performance in a professional environment. One of the best ways to practice this is by using Cisco Packet Tracer. It is easier to configure compared to other network simulation software. In this blog, you will learn how to configure a wireless access point in Packet Tracer step-by-step.
What You’ll Learn
- How to set up a wireless access point
- How to configure laptops and smartphones to connect wirelessly
- How to use a DHCP server for IP addressing
- How to expand the wireless network and set up wireless security using WPA2-PSK
Lab Setup
Here in this lab we will configure a Cisco wireless access point in Packet Tracer from scratch.
Start by dragging and dropping the following devices into the workspace:
- 1 Wireless Access Point (AP)
- 2 Laptops
- 1 Smartphone

The smartphone has been connected to the access point, but laptops are unable to connect directly to it. Why is that? Because laptops come with a wired network by default. Therefore, you need to change it to a wireless adapter, as below in the screenshot below.
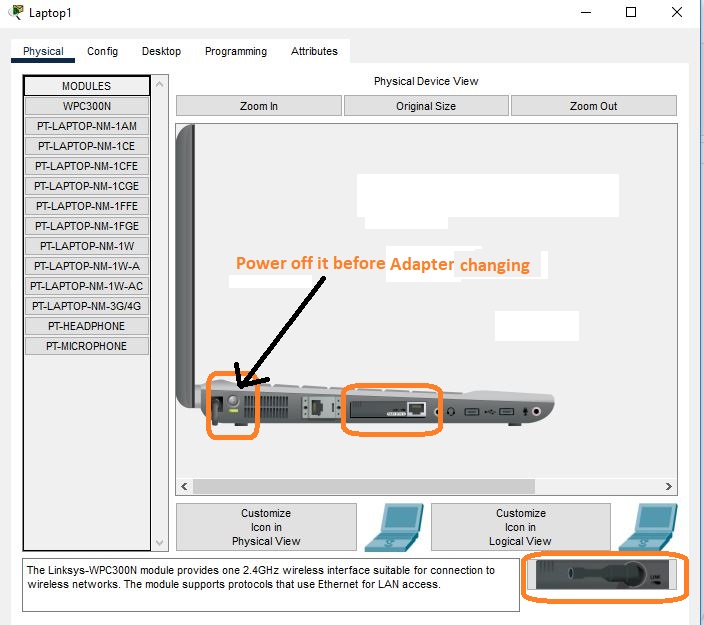
Remove the existing adapter and place it in the designated slot, as shown in the image below.

Add the Linksys-WPC300N module to the laptop to enable wireless connectivity, and then power on the laptop.
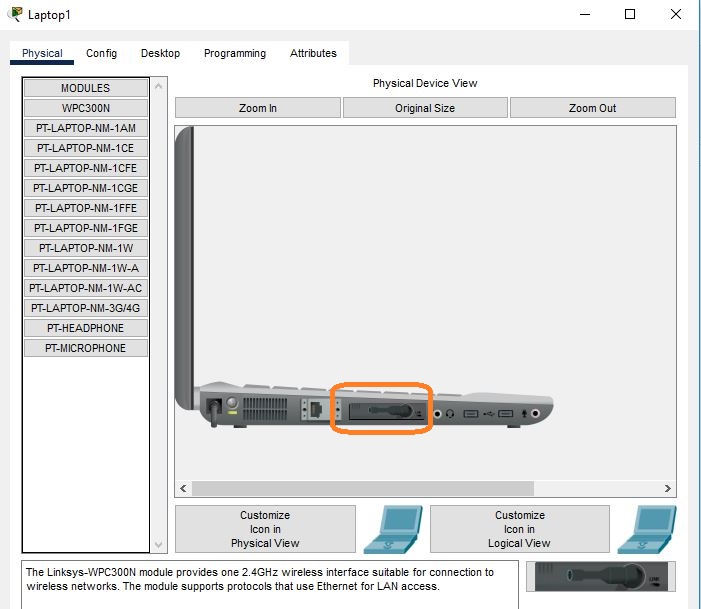
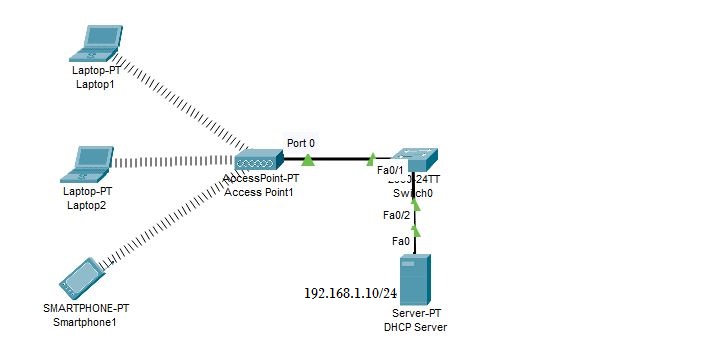
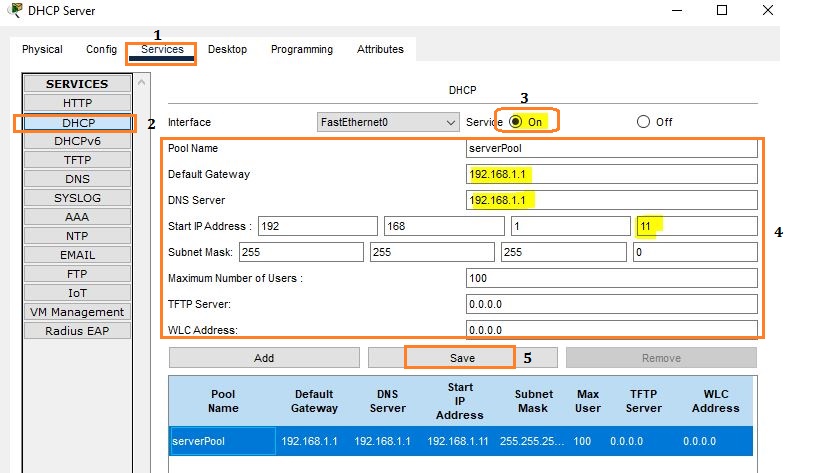
In the same way, configure the second laptop. After that, add a switch and a DHCP server to the topology. Connect the switch to the wireless access point through port 0. Finally, set the IP address of the DHCP server to 192.168.1.10/24.
Configure the DHCP server settings, including the IP address pool, default gateway, and DNS server.
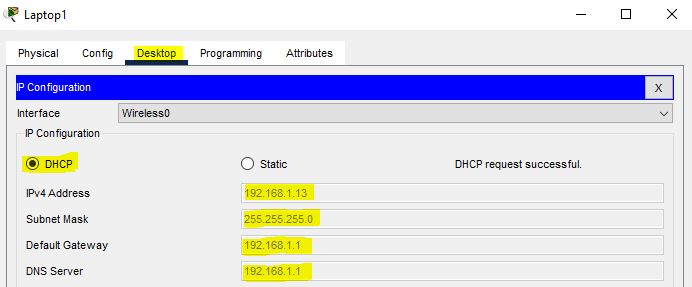
Enable DHCP on Laptop1 in the topology.
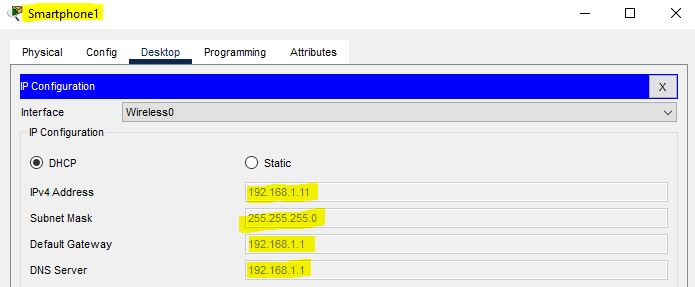
Enable dhcp on the second laptop as well. Additionally, enable dhcp on the smartphone.
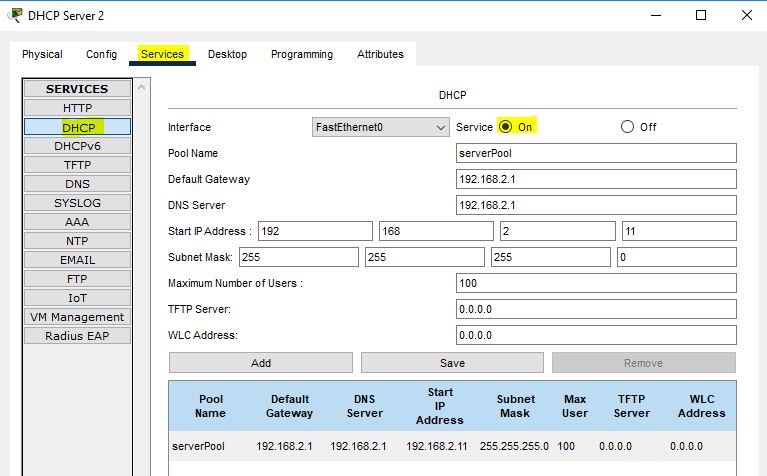
Now, we will expand our topology by adding a router, a switch, another Cisco wireless access point, and a second DHCP server. Configure the IP address of the second DHCP server as shown in the screenshot (192.168.2.10/24).

Set up second DHCP server as given below:
Add three more laptops in the topology. You will notice that they connect randomly to either of the access points.
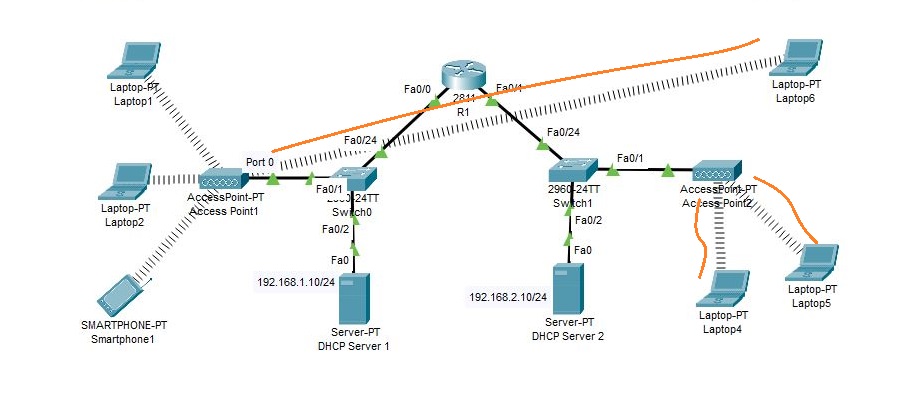
Laptop6 is connected to the first access point (AP), while Laptop4 and Laptop5 are connected to the second AP.
In order to resolve this issue, we will configure authentication on the second AP. The authentication we will use is WPA2-PSK. To address this issue, we will configure authentication on the second access point using WPA2. PSK
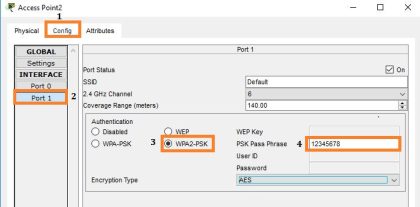
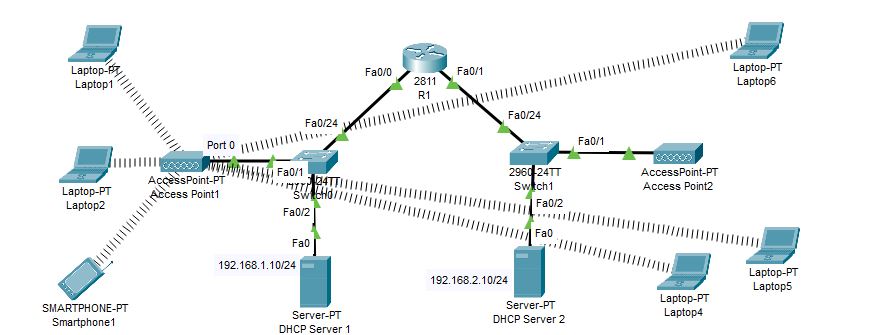
Now, examine the topology shown in the screenshot below, and pay close attention to Laptop4, Laptop5, and Laptop6.
Once authentication is enabled, Laptop4, Laptop5, and Laptop6 will be disconnected from the second AP and will automatically connect to the first AP.
Go to each laptop and enter the following passphrase.
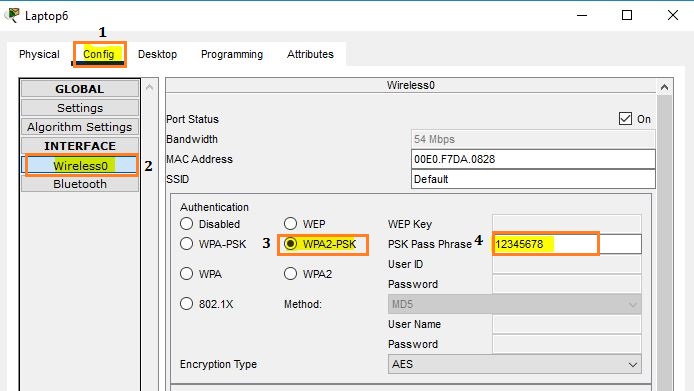
After entering the passphrase on all laptops, you will observe that all three laptops disconnect from the first access point and connect to the second access point, as shown below.

The next step is to obtain an IP address from DHCP Server 2 on each laptop using DHCP.
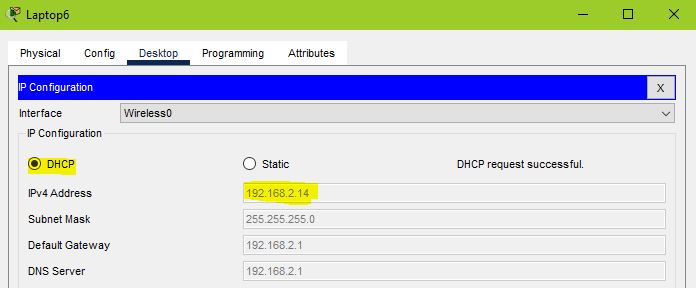
We will now check connectivity from Laptop6 to the gateway, as well as to the router interface Fa 0/0 side.
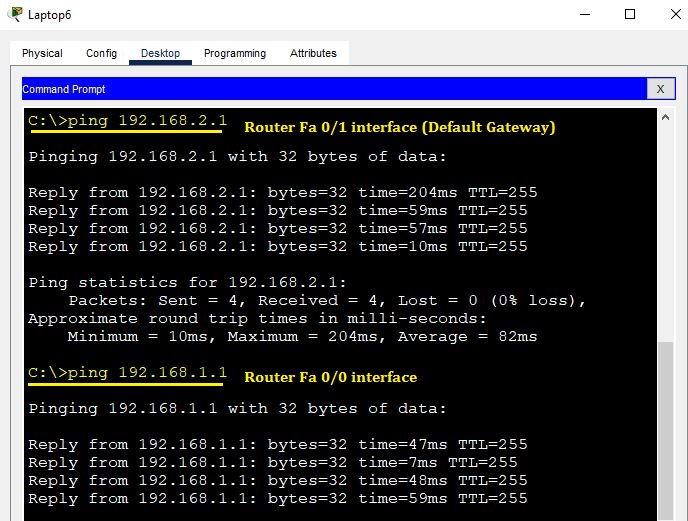
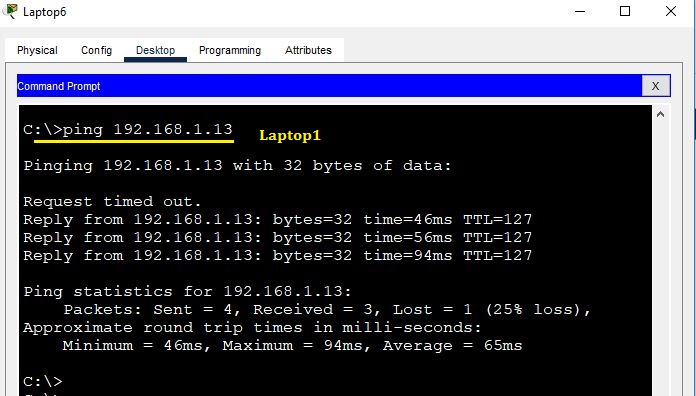
The ping to the gateway was successful. Now, proceed to ping Laptop1.
In this lab, we walked through the entire step-by-step process to configure a wireless access point in Packet Tracer, starting from connecting devices and enabling wireless adapters to setting up DHCP and securing the network with WPA2-PSK. These are real-world tasks you’ll likely face in a professional environment, so practicing them in Packet Tracer is a great way to build your confidence.


