How to Connect Computer to a Router in Cisco Packet Tracer
Connecting a PC to a router is a basic lab in computer networking and any simulator software. We connect our PC to the router for different purposes. Sometimes we want to check connectivity between any two stations. We want first to connect the PC directly with the router. Sometimes, we want to take router configuration or IOS backup to a TFTP server, and then we can connect our router to the TFTP server.
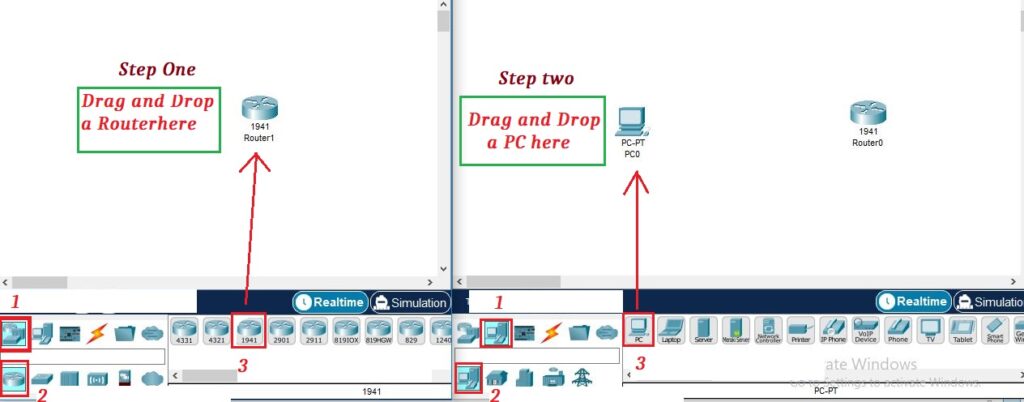
Dragging and Dropping a Router and a PC

We drag and drop two devices routers and a switch. The next step is to connect them via cable. We will use a copper cable. There are two types of copper cables for connecting devices. Straight-through cable and crossover cable. Straight-through cable is used to connect the same type of networking devices. Crossover copper cable is used to connect different types of devices. Here in this lab, we will use a crossover copper cable. so first click on [Connections] and then select crossover copper cable. When you select the cable, then click on router and select Gigabitethernet 0/0 or Gigabitethernet 0/1. Here, we are selecting Gigabitethernet 0/0.

Click on PC and select Fastethernet0.

We have connected the PC to the router, but the cable is still red. The red color indicates that the line has no IP and is shut down from the router’s side.

Router configuraiotn
Select CLI

Write “no” on the indicating point.

write “enable” command

1st write the “enable” command to go to privileged mode, then write “configure terminal” to go to global configuration mode. Change the router name from Router to R1 by writing the “hostname” command followed by the name of the router as in below.

Run a command in privilege mode “show ip interface brief”. This command helps a user to check how many router interfaces. Whether these interfaces have an IP address already or not? Whether its protocol is down or not? Here, there is no IP address assigned to the interfaces. We will assign IP address to the Gigabit ethernet 0/0 because we connect the router to the PC through this interface.

To assign an IP address to the router interface, follow the below commands. When the IP address is assigned to the router interface and you run the command “no shutdown,” then the interface is changed to upstate from the shutdown state. Run the “no shutdown” command after the interface’s IP assignment.

Now we will verify whether the interface has gotten IP address or not. Whether its protocol is up or down?

Few seconds the router interface was red, but after IP assignment and with the help of the “no shutdown” command it has been converted into upstate.

PC Configuration
Click on PC0 and select Desktop Tab.

Click on IP Configuration

Select static and then assign the 11.1.1.2 IP address to the PC0. After the IP assignment, press the tab button on the keyboard button, and then it will take the 255.0.0.0 subnet mask.

The next step is to verify connectivity between a router and a PC. Go to a router R1 CLI or click on router and write PC0 IP address (11.1.1.1), then press enter. When you get the following message, then it means that there is full connectivity between Router R1 and PC.


