How to connect two PCs in a Cisco Packet tracer?
Packet Tracer
A packet tracer is easy to install and easy to make a computer network by dragging and dropping network devices and end devices. I am going to start with a very basic lab in packet tracer. The first lab starts with how to connect two PCs in a packet tracer.
For this reason, first, take two PCs from end devices, and connect them by cross cable from the cable section.
Assign IP addresses to the PCs and then ping each PC to verify their connectivity.
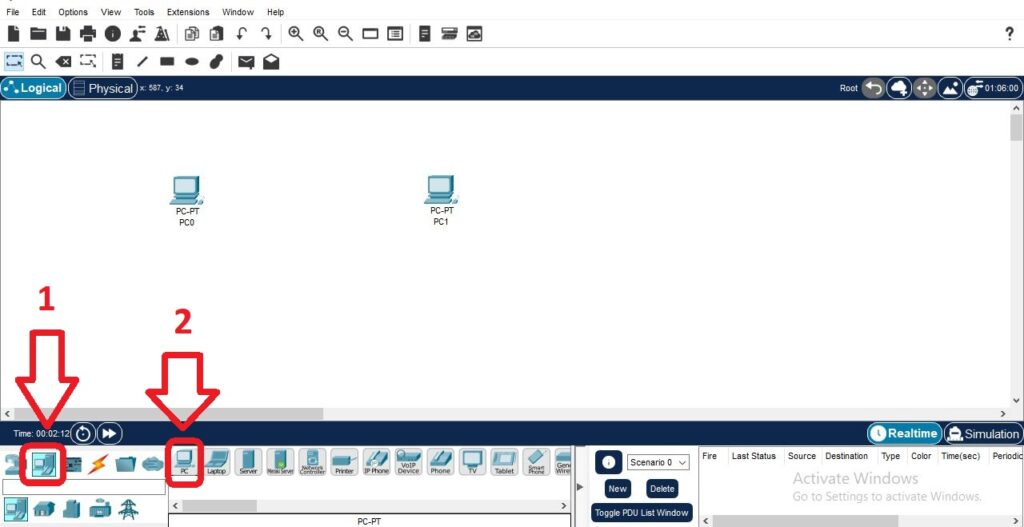
- Turn on the packet tracer as below in the diagram.
- select [End Devices] & then take two PCs.
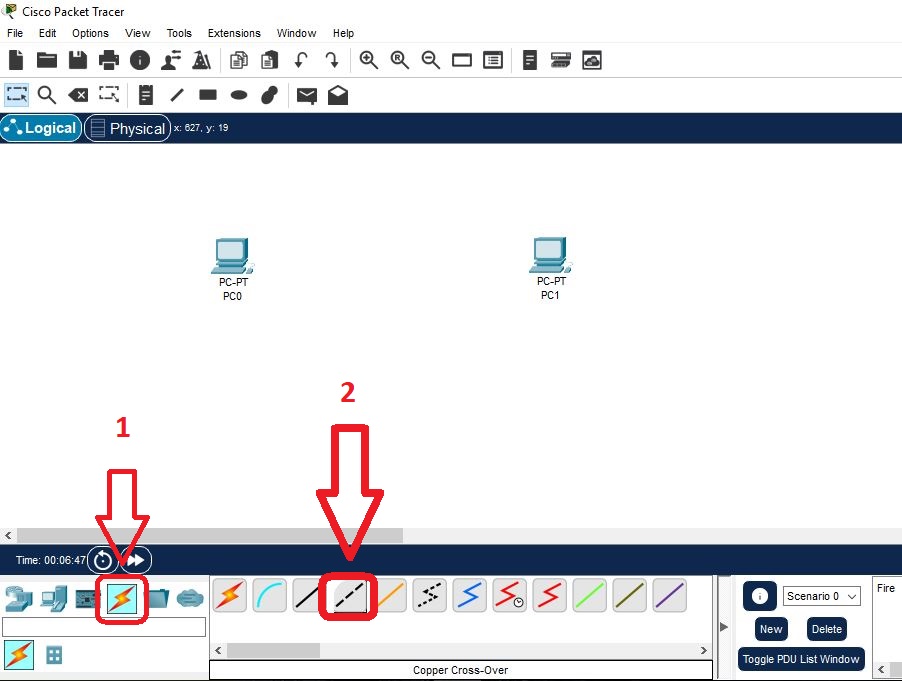
3. Connect the Two PCs by taking a cross cable from Connections.
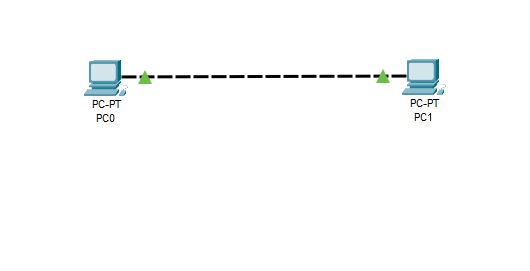
4. Click on PC0 and select FastEthernet 0. Similarly, click on PC1 and select FastEthernet 0. So they will look as.
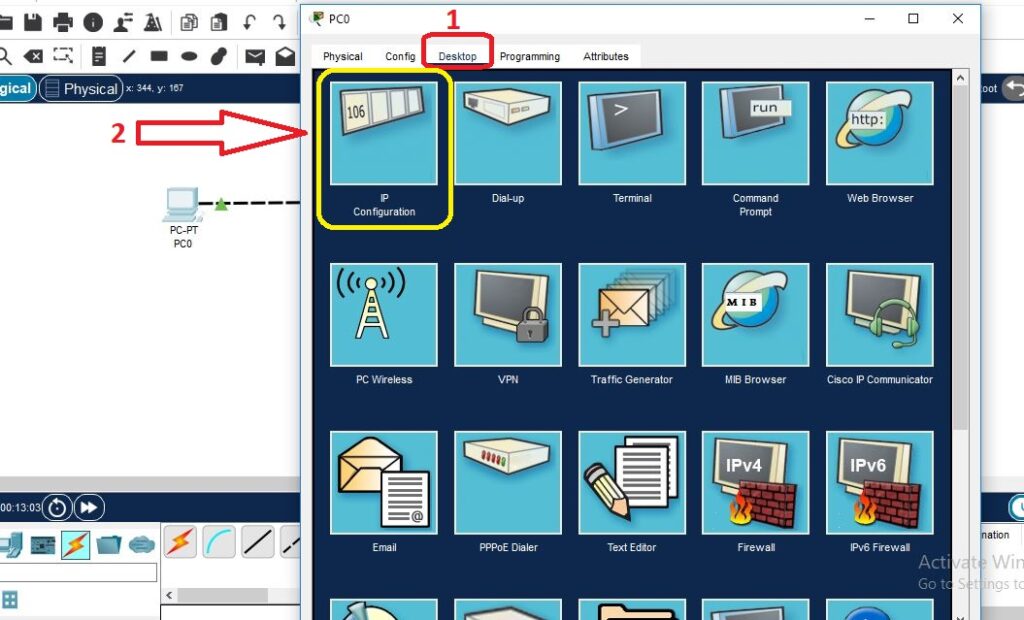
5. After connecting the cable, the next step is to assign an IP address to both PCs. Click on PC0 and then click on Desktop. After that, click on IP configuration.
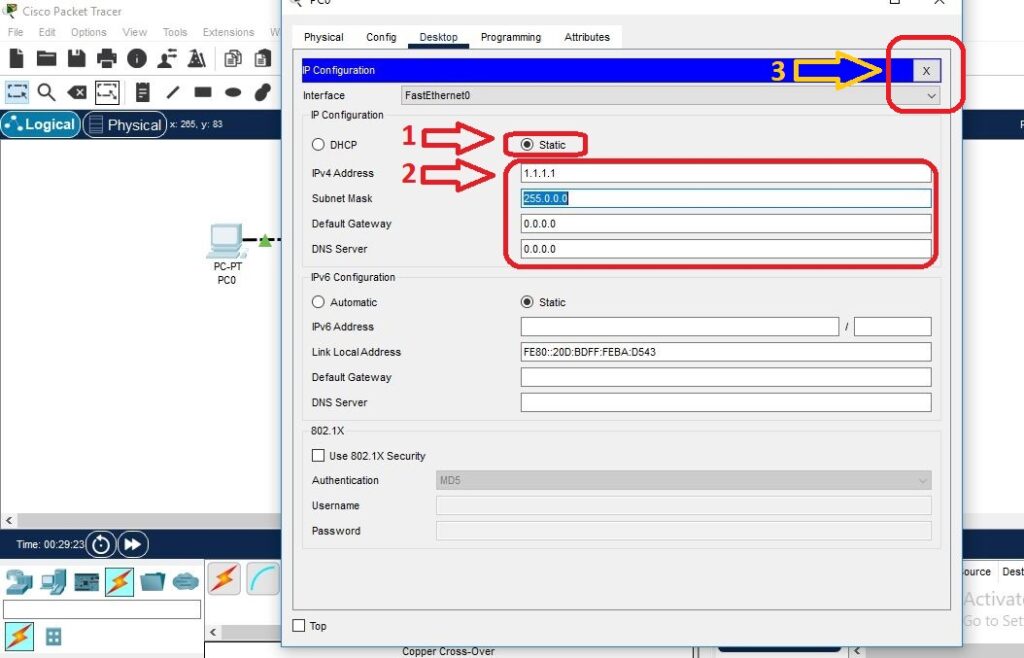
6. Assign IP address 1.1.1.1 to the PC0, After assigning the IP address, close the window.
8. Assigning IP address to the PC0, now repeat the same step and assign the IP address to PC1.
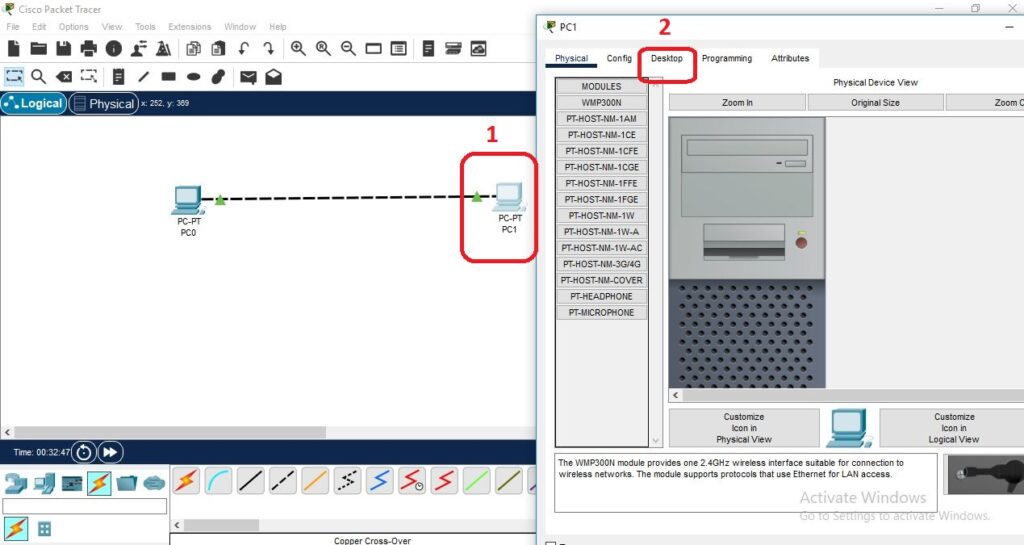
8. Click on IP configuration
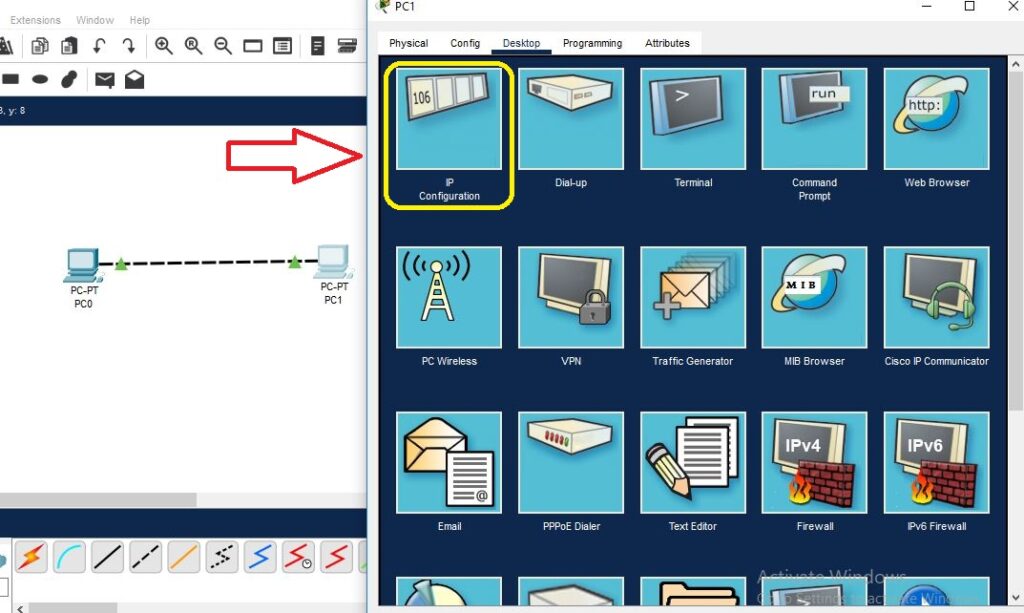
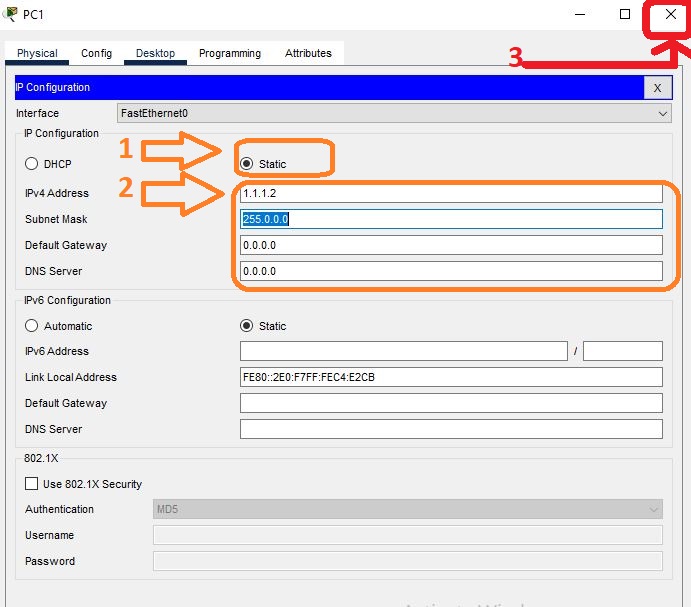
9. Assign IP address 1.1.1.2 to the Pc1 and then close the window.
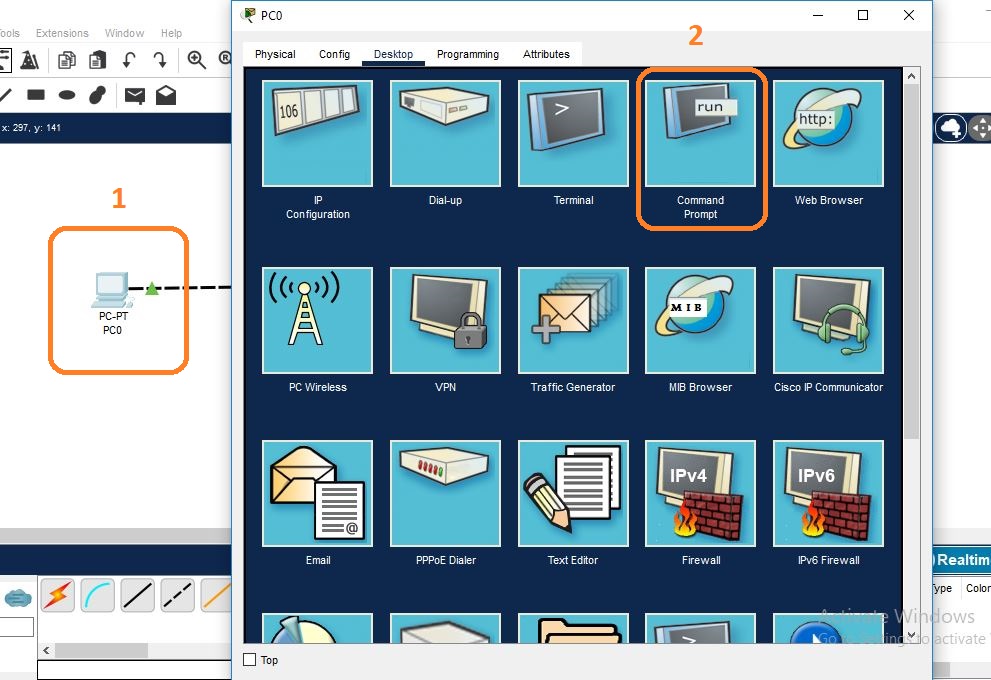
10. As both PCs are connected and also assigned IP addresses to them. The next phase is to find their connectivity. For this reason, click on PC0, then click on the desktop, and at last click on the command prompt.
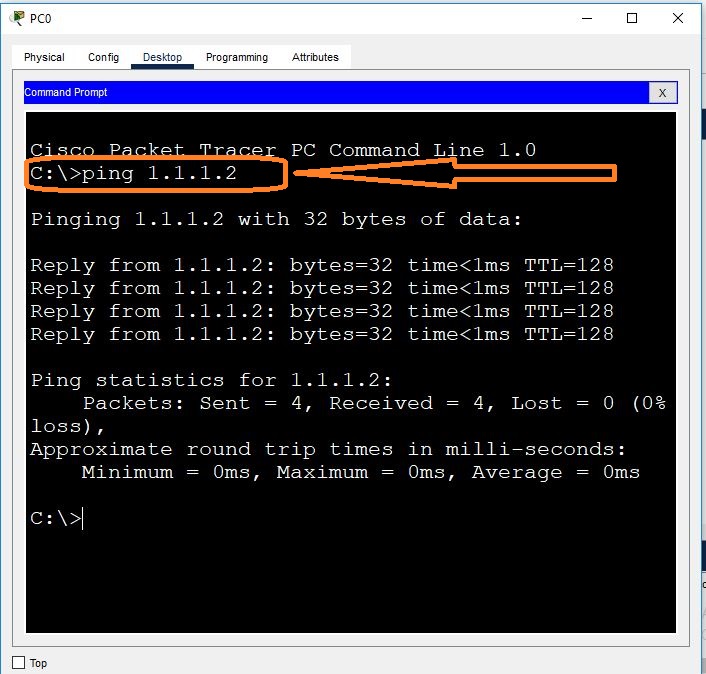
11. In the command prompt, write the ping command and then write IP address 1.1.1.2 of the 2nd PC (PC1 Destination address), if you get this message as in the below diagram, then the ping command is successful i.e. both PCs are connected and working.
12. again repeat the same steps on PC1 (PC2) for connectivity verification.
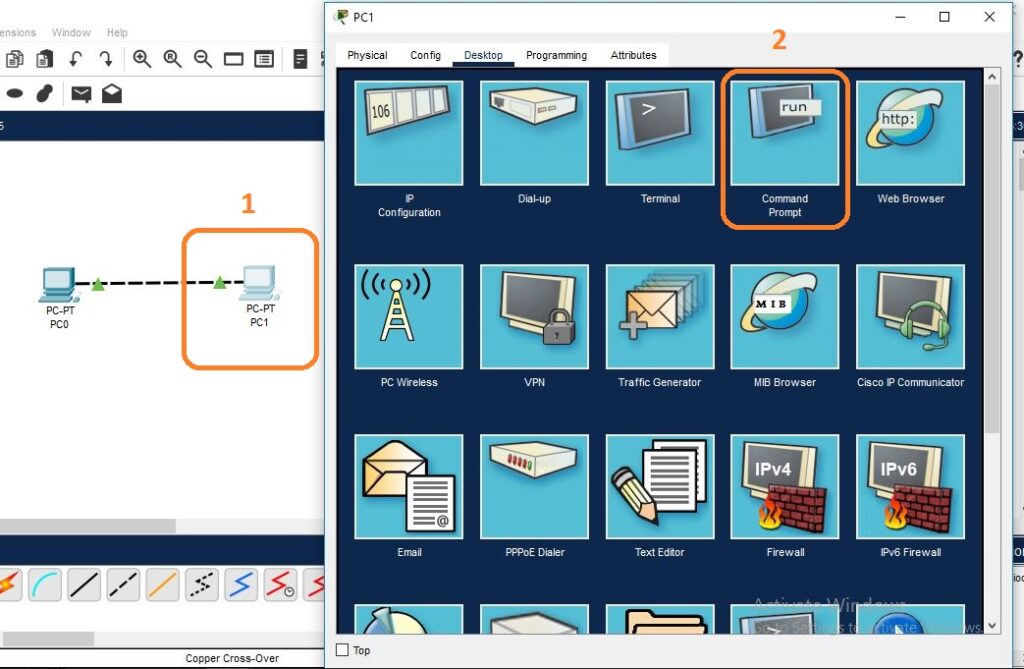
13. Now put the IP address of pc0 (pc1) in the command prompt of PC1 (PC2).
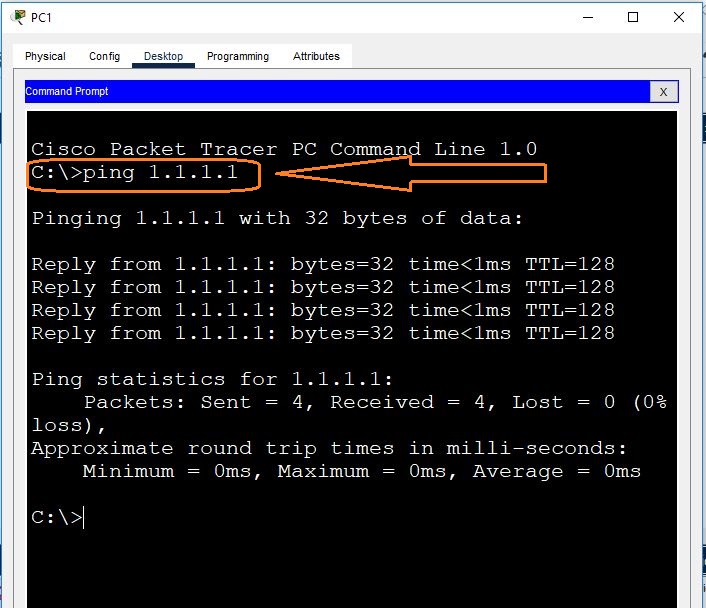
From the above command, it is clear that both PCs are connecting with each other.


